Miniature Scenery: U-Boot WiP
Der U-Boot-Bau bei Miniature Scenery geht weiter.
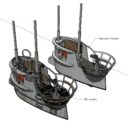
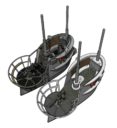
Let’s Make a U-boat. Part 4.I mentioned earlier that there will be two levels of detail available for this kit. The Standard kit will feature easier construction and simplified forms, ideal for gaming and a quicker build times.The more detailed version will contain loads of extra parts which, within the limitations of the MDF/cardboard medium, provide a much more realistic final result.Most of the differences will be centered around the conning tower. At the moment the the standard detail version is about 60 parts. The HD version about 185…….I may or may not have been having WAY too much fun.
Let’s make a U-boat. Part 5Decks.The decks on U-boats (particularly early types) featured very distinctive patterns of slots and holes which I really want to get right. So research occurred.Of interesting note is the large hatch looking objects on the deck do not actually lead into the boat itself, but are in fact the lids for watertight containers for life rafts. The only crew access was via two 22″ diameter hatches located in the conning tower and just aft of the bridge above the galley. All ships stores had to go through these hatches (except for the torpedoes, Which had their own special angled hatches hidden under the deck plates ….also about 22″)There are still a few details to add, but it’s nearly there.
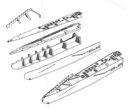
Let’s Build a U-boat. Part 6.Working on the structure for the centre section. There are a lot of subtle curves in a U-boat. Well, I guess its a giant mechanical fish, so that makes sense. I want this to be as straight-forward to assemble as possible, but at the same time not sacrifice too much accuracy. So things like the saddle tanks need to in multiple pieces to maintain the right curves. And Multiple pieces mean more internal frames to make it all easy and intuitive to line everything up. Decided also that it should be easy to leave the conning tower removeable.Going to do some test builds shortly. I’ve laid out the essential parts for the conning tower ready for a trial cut.
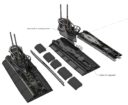
Let’s build a U-boat. Part 7.Nearly there. Pictures of the almost completed design (standard version). Parts count a bit over 250. So around the same as box of space marines. The HD kit will probably double that….It’s an interesting journey of deciding how much detail to put in vs. buildability vs cost.Also shown the Break-down of the Bow section. The HD version will include a better detailed net cutter and a few smaller deck details like cleats and the capstan winch.So is this engendering any conversations elsewhere? Facepage doesn’t show me where it’s been shared to private groups for example. Now is the best time for feedback, before we commit to a final product.
Let’s build a U-boat. Part 8.Private Jenkins looks about the unfinished con for a hatch in which to yeet his mills-bomb.Test build success! Even the railing worked. I think I’ll beef up the attachments for them though. If only for the Standard version. They are a little squishy, but giving them a coat of super-glue will toughen them up.
Let’s make a U-boat. Part….uhhhmmm… nine? yes. Nine.I’ve completed the centre/control section and broken it down for a test run. Hopefully this goes together well, then we’ll be on the home stretch.Played around with the idea of producing a much simplified/smaller version, but I just couldn’t take it seriously. I feel like it needs a squirt gun and bubble blowing device.
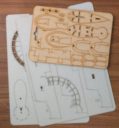
Let’s make a U-boat. Part X.Small update, exciting progress.Test build no.1 for the control section has turned out even easier than I expected. And the deck looks awesome.Just one or two minor tweaks. I didn’t leave sufficient room for the tabs from the conning tower and I think I can reduce the number of panels on the saddle tanks to 3 from 5.Also ran sum super-glue over the railing on the conning tower, which has toughened them up considerably.
Quelle: Miniature Scenery bei Facebook









Kommentare