Star Wars Armada: Admiral Raddus
In einem Gastbeitrag zu Star Wars Armada von Fantasy Flight Games wird Admiral Raddus vorgestellt, der Befehlshaber der Rebellenflotte aus Rogue One.
“Rogue One, may the Force be with you.”
–Admiral Raddus, Rogue OneAt the climax of Rogue One, three storylines are playing out simultaneously. One chronicles Jyn Erso and Cassian Andor’s heroic infiltration of the Imperial installation. The second follows their Rebel comrades as they wreak havoc outside the base, creating chaos and buying Jyn and Cassian the time they need to succeed. And the final storyline follows the Rebel fleet, providing orbital support and a chance to receive the transmission of the vital Death Star plans.
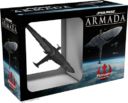
Those Rebel starships in orbit are under the command of Admiral Raddus—who’s coming soon to Star Wars™: Armada in the Profundity Expansion Pack. Today, guest writer Chris Fritz shares his thoughts on making Raddus shine in your Rebel fleet!
Chris Fritz on Admiral Raddus
Hey everyone! Those of you that hang around the online Star Wars: Armada community may know me as Truthiness. I’m a community blogger and gamer, focusing heavily on Star Wars: Armada, and I’m really excited that Fantasy Flight Games invited me to share my ramblings to the community at large. Those of you that follow me on the Steel Command blog know that I absolutely love theorizing and breaking down new and emerging fleet builds. Today, I have the pleasure of doing so for none other than Admiral Raddus.
First, I should address a little bit of my philosophy on fleet building. While some believe that fleets should be able to function independent of their commander, I firmly believe in starting with the commander and building the fleet around that central pillar. Sure, some commanders don’t really need this: Admiral Motti and Moff Jerjerrod generally work in pretty much any fleet. Many others, however, such as Admiral Ackbar and Mon Mothma, require a little more forethought and care when constructing their fleets. Do you really want a bunch of Nebulon-B frigates or Hammerheads with Admiral Ackbar? Are you going to take nothing but big ships with Mon Mothma? Of course not! That doesn’t make them bad commanders. It just means you have to plan a little more deliberately when you’re putting together your fleet.
With that philosophy in mind, let’s take a closer look at the topic of today’s article. Above all, Admiral Raddus shatters the normal deployment paradigm of Star Wars: Armada. Deployment can be critical to deciding the outcome of a game, and getting that last ship placement can be a major deciding factor. While a fleet with multiple small units might not care, deployment often makes or breaks large ships. If you deploy in the wrong position, you can end up out of the fight for critical turns or flying straight into a trap you can’t avoid. As such, players often load up on cheap squadrons and flotillas to pad deployments. That’s where Admiral Raddus comes crashing in out of nowhere to ruin your opponent’s best laid plans. With Raddus as your commander, you essentially guarantee that you get the last deployment, but without needing the usual investment. Squadron padding for deployment’s sake becomes unnecessary. Objectives like Solar Corona or Superior Positions don’t hold as much appeal for your own objective deck.
Raddus also changes normal activation dynamics. If you’ve been around Star Wars: Armada for a while, you’ll know that the number of activations on your side is a pretty big factor. Being able to guarantee the last activation and move your ship into perfect position without worrying about return fire is crucial. When combined with first player, it can be the deciding factor in a game. Just a single sequence of last activation followed by first activation with the same ship can swing the game.
Raddus changes that normal logic for one of your ships. Up until you use his ability, Raddus guarantees you could have the last say in positioning during any one round. Your opponent may have “out-activated” you, but because the ship brought in by Admiral Raddus comes in at the beginning of a round, you get to react to that final positioning. It only works for that one turn, but as I said, that can make all the difference. As second player, you can use that advantage to force the first player to choose between his planned first activation or getting smashed in the flank by your newly arrived ship. As first player, you may not get an immediate reward for your positioning, but you certainly will in subsequent turns.
My last major consideration with Raddus is really more about what isn’t in his limitations versus what is. Namely, there is no limitation on the size of the ship you bring in from hyperspace. If you’ve played an All Out Assault in The Corellian Conflict campaign expansion, you have an idea of how incredible it can be when a large ship hyperspace-jumps into the battlefield. Raddus gives you that advantage in every time. There is a little bit of a catch-22, though. To get the most out of your new ship’s placement, you want to throw a lot of points into a large ship equipped to cause maximum pain. However, you also want a good number of other ships in your fleet to maximize the flexibility of placing your ship that hyperspace-jumps into play. You may choose to use lots of flotillas and sacrifice ship-to-ship firepower, or you may skimp on squadrons and become more vulnerable to attack from your opponent’s squadrons. Both approaches have their risks and advantages.
Admiral Raddus brings in an MC80 Star Cruiser out of hyperspace to catch the Imperial fleet in the flank!
I find the best place to start when building an Admiral Raddus fleet is with that large ship. This ship will define your approach to the rest of your fleet. One of the most potent combinations I’ve seen is an MC80 Command Cruiser loaded up with upgrades: the Defiance title, Quad Battery Turrets, Leading Shots, Electronic Countermeasures, Flight Commander, and most importantly, Rapid Launch Bays. You then load up the Rapid Launch Bays with three B-Wing squadrons and a HWK-290. All put together, it unloads an absolutely hellish burst of firepower coming out of hyperspace, with little your opponent can do to stop it.
My personal favorite is using a MC80 Battle or Star Cruiser. While it won’t match the burst potential of the Defiancecombination shown above, it has a long reach combined with good speed to keep up the pressure. An MC80 Battle Cruiser with Spinal Armaments, a Gunnery Team, and Leading Shots will spit out a lot of dice over a wide area, with Raddus giving you the perfect positioning.
From there, you just need to decide what your support ships are going to be. Because you want options for the hyperspace deployment, you need a fair number of ships. I set my personal minimum at four (not including the hyperspacing ship) to maintain maximum flexibility. That likely means you’re looking at Hammerheads, CR90s, and/or GR-75s. You need at least a Hammerhead to use as your flagship. After all, you can’t use Admiral Raddus if he’s not on the board and you can’t use a flotilla as his flagship. I find the support ships that you choose often depend heavily on how competitive you want to be in the squadron game. If you don’t mind going light on squadrons, you can grab more Hammerheads and CR90s to supplement your ship-to-ship firepower. Or, if you feel the need to maximize squadrons, you’ll gravitate toward flotillas and their cheap squadron activations. Here are a couple fleet builds with some of the above considerations:
Defiance
391/400 points
MC80 Command Cruiser
– Defiance
– Flight Commander
– Engine Techs
– Rapid Launch Bays
– Electronic Countermeasures
– Quad Battery Turrets
– Leading ShotsHammerhead Torpedo Corvette
– Admiral Raddus
– External RacksGR-75 Medium Transports
– Bomber Command CenterGR-75 Medium Transports
– Comms NetGR-75 Medium Transports
– Bright Hope
– Toryn Farr3x B-Wing Squadrons
1x HWK-290
2x A-Wing Squadrons
Shara Bey
Tycho CelchuThis fleet wants to play heavily in the squadron phase. Shara, Tycho and the A-wings are there to fend off enemy bombers. Meanwhile, Raddus drops in Defiance to gut the enemy fleet. This is a very “all or nothing” approach, but one that can work well if executed properly.
Liberty or Death
392/400
MC80 Battle Cruiser
– Raymus Antilles
– Gunnery Team
– Leading Shots
– Nav Team
– Spinal Armament
– XI7 TurbolasersHammerhead Torpedo Corvette
– Admiral Raddus
– External Racks
– Task Force AntillesHammerhead Torpedo Corvette
– External Racks
– Task Force AntillesHammerhead Torpedo Corvette
– External Racks
– Task Force AntillesHammerhead Torpedo Corvette
– External Racks
– Task Force AntillesGR-75 Medium Transports
– Slicer ToolsShara Bey
Tycho CelchuThis list illustrates the reverse approach, emphasizing ship-to-ship firepower and allocating a bare minimum of resources to manage the squadron fight. The abundance of Task Force Antilles titles will help mitigate some of the worst bomber attacks, but it still risks getting overwhelmed by squadrons. On the flip side, the MC80 Battle Cruiser brings a fearsome amount of consistent, long-range firepower that covers a large area.
Those two lists are just a small taste of the opportunities that Raddus opens up for Rebel players. Like you, I’m chomping at the bit for Wave VII, and I can sincerely say that the design team knocked this wave out of the park. Thank you all for reading!
Der deutschen Vertrieb der Fantasy Flight Produkte liegt bei Asmodee.
Quelle: Fantasy Flight Games


Interessanter Artikel. Raddus Admiralsfähigkeit klingt ja mächtig, ist aber auch ein One-Trick-Pony. Viele andere Kommandanten geben ja Boni über das Ganze Spiel hinweg. Raddus kann dafür halt nur einmal ein Schiff an eine kritische Stelle holen, das wars dann auch – danach ist Raddus praktisch Kanonenfutter – kein Wunder, dass der Spieler oben den in das billigste Schiff der Flotte packt…
Und wieder schlägt die Autokorrektur gnadenlos zu.