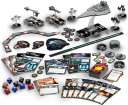
Star Wars Armada: Weitere Previews
Für Star Wars: imperial Armada zweigt Fantasy Flight Games weitere Regel-Previews.
“Move as close as you can and engage those Star Destroyers at point-blank range.”
–Lando CalrissianThe battles of Star Wars™: Armada are about as large as battles get. Rebel and Imperial fleets collide above Outer Rim planets or outside of asteroid fields. Star Destroyers and Rebel frigates exchange turbolaser fire as screens of TIEs swarm X-wings and Corellian corvettes. The fate of the galaxy hangs in the balance.
As large as the space battles of Armada are, they flow seamlessly over six rounds, each of which is divided into four phases. In our last preview, we looked at the Command Phase and how it forces you to plan for the future, even as you respond to the changing tides of battle. Larger ships are more powerful, though less responsive, and while they’re capable of resolving more commands within a single round, they force you to plan further ahead. A single round of combat may be the culmination of three or four rounds of planning.
When the moment comes to fire, then, you’ll want to be sure to make it counts. In today’s preview, we’ll look more closely at the Ship Phase, focusing on ship-to-ship combat and its brutal exchanges of turbolaser blasts and artillery fire.
The Ship Phase
In Armada, after you and your opponent have selected all your commands and placed them on the bottom of your ships’ command stacks, you proceed to the Ship Phase, in which you and your opponent take turns activating your ships one at a time.
When it’s your turn, you can choose any of your capital ships that has not already activated during the round and activate it. Each activation has three steps: Reveal Command Dial, Attack, and Execute Maneuver.
1. Reveal Command Dial
Once you select which of your ships you intend to activate, you reveal the top command from its command stack and place the dial faceup next to your ship. If you want to resolve the command from the dial for its full effect, you can do so at the appropriate time. Otherwise, you can spend the command to gain the matching command token and place it next to your ship.
The Imperial player reveals a navigate command from the top of a Victory I-class Star Destroyer’s command stack.
2. Attack
After you reveal your ship’s command dial, your ship can perform up to two attacks, though each must originate from a different hull zone. Each attack can target a single hull zone on an enemy ship or one or more enemy squadrons. We’ll look at how your ship resolves its attacks in more detail below.
Few things in the galaxy are deadlier or more terrifying than direct fire from an Imperial Star Destroyer!
3. Execute Maneuver
After your ship performs its attacks, it executes a maneuver. Using the game’s articulated maneuver tool, you must move your ship a distance corresponding to its current speed, tracked on its speed dial.
Notably, your ship’s movement is based upon its speed. Each ship’s card features a speed chart that indicates the number of steps you can adjust the maneuver tool’s yaw at each joint, and the only way to adjust your ship’s speed is to resolve a navigate command.
A Nebulon-B frigate uses the game’s maneuver tool to set its course for a four-speed maneuver, adjusting the template one click right at the second joint and two clicks left at the third joint.
After you finish executing your ship’s maneuver, you place its command dial faceup on its ship card, and your opponent can activate a ship.
Maximum Firepower
As mentioned earlier, each of your ships can perform up to two attacks when it activates, and getting the most out of these attacks is crucial to your success. As a result, it’s vital that you understand how to create the best possible pool of attack dice, anticipate your opponent’s defenses, and learn to position your ships to anticipate their attacks in the next round.
The strength of your attack is represented by its pool of attack dice. There are three types of color-coded, eight-sided attack dice, and each corresponds to a different maximum firing range, as indicated on the game’s range ruler.
The combination of dice that you roll for an attack against an enemy ship’s hull zone depends upon the hull zone from which your attack originates and is indicated on your ship card. If you choose, however, to have your ship perform an attack against one or more squadrons, it uses a different pool of attack dice. Each ship has an anti-squadron armament that is indicated to the right of its hull value on the ship card, and it uses this pool of dice against squadrons, regardless of the hull zone from which it fires
Though the Victory II-class Star Destroyer features a primary attack of six dice from its front firing arc, its anti-squadron armament consists of just a single blue attack die.
It’s also worth noting, at this point, that the different versions of your ships may feature different armaments with different combinations of attack dice. For example, the CR90a Corvette attacks out of its foreward hull zone with two red dice and one blue dice, but the CR90b Corvette attacks from the same hull zone with three blue dice.
Two of the CR90a’s attack dice can fire at long range while the CR90b is limited entirely to shots at medium or close range.
As you can see, gaining maximum impact from your attacks is a matter of catching your target within the ideal range and firing arc of your most lethal hull zones. You can further enhance the impact of your attacks by adding dice with the concentrate fire command and spending a concentrate fire command token to reroll any unfavorable result.
Against this, you’ll want to consider the sort of retaliatory fire that your opponent’s ships might be able to send your way. For example an Imperial admiral in command of a badly damaged Victory I-class Star Destroyer might choose to fire at a CR90b Corvette from long range for only three red dice, rather than plot a course to fire at it from close range for three red dice and three black dice.
At that longer range, the Victory I is safely out of range of the Corvette (as illustrated above by the first diagram above). However, at shorter range (as illustrated by the second diagram), the Star Destroyer doubles the impact of its attack, but it also makes itself vulnerable to the three medium-range blue dice from the Corvette’s foreward hull zone. If it doesn’t destroy the Corvette, the Corvette might punch through its final defenses and destroy it.
Reroute Power to the Forward Deflector Shields
Meanwhile, as you batter your opponent’s ships with turbolasers, missiles, and proton torpedoes, your enemy is firing back at you. If you want your ships to survive the battle, you need to make the most of their different defenses.
Your ship’s first defenses are its shields. Each hull zone has a shield value, which indicates how much damage its shields can absorb before they fail.
Hits against a hull zone that has lost its shields deal damage to the ship’s hull. Each ship has a hull value listed underneath its title, and if it suffers damage equal to or greater than its hull, it is destroyed.
To prevent your opponent from dealing damage to your hull, then, you need to do more than simply rely upon your shields. Each ship indicates a number of defense tokens that it can use while defending against an attack, and each token allows your ship to perform a different action in response to the attack in order to mitigate its results.
These tokens make your defense a matter not only of statistics, but also tactics. Once you use one of these tokens, it is exhausted and turned facedown, displaying its red side. Exhausted tokens aren’t refreshed until the end of the round, so if your ship is exposed to multiple attacks, you need to think carefully about when you want to use one of your defense tokens.
Once used, a readied defense token (green) is exhausted (red).
It is possible to use an exhausted defense token, but doing so removes it from your ship entirely. You no longer have that defensive option available to you each round.
Finally, it’s important to remember that you can use the engineering points you gain from the repair command to repair your ship’s hull or shields. However, you can’t use these points outside of your ship’s activation, so while they may help you recover from the damage you sustain during an attack, they don’t offer you any additional protection during the attack.
Moving into Attack Position
Even though your ships can each perform two attacks in the Ship Phase, those attacks must originate from different hull zones. Since each of your ship’s hull zones has its own firing arc, and none of these firing arcs overlap, your ship will often need to perform its two attacks against different targets.
Unfortunately, if you direct your attacks against multiple targets, rather than training them all against a single hull zone, the reduction in concentrated firepower may give your foes the time they need to refresh their defense tokens, redirect their shields, repair damage, and brace themselves for multiple additional rounds of combat.
This means that you need to coordinate your attacks as much as possible, both by training the weapons from multiple ships against a single hull zone and by setting courses for your ships that leave them in position to target the same, compromised enemy hull zone with attacks from two of their hull zones.
Of course, this is easier said than done, especially since you and your opponent are always trading activations. In the end, learning how to coordinate your fleet is something of an art form, and if you can concentrate the fire from multiple ships against a single target, you’re well on your way toward destroying that target and defeating your foe.
You Are in Command Now
In Armada, you take on the role of fleet admiral, and it is your job to coordinate the actions of the thousands of men and women under your command. As your ships tremble and groan under the barrage of enemy fire, you are the one who must direct their fire, their defenses, and their movement. Can you deliver the commands that will see your side emerge victorious?
The battles of Armada are massive, and they’re brutal. Moreover, they’re every bit as much about tactics as they are about raw firepower. We’ll continue our exploration of these tactics in our next preview when we take a closer look at how capital ships make use of the game’s unique maneuver tool and how they interact with obstacles!
Der deutsche Vertrieb der Fantasy Flight Produkte liegt bei Heidelberger.
Link: Fantasy Flight Games


Ich freu mich schon tooootal auf das Spiel!!!
😊
Denke mal auch das es ein Kracher wird. Zumal schon auch alles bemalt ist.
Die Jäger sind doch aber nicht bemalt, wenn ich mich recht erinnere?!
Die Entwickler von FFG haben sich auf jeden Fall Gedanken darüber gemacht, damit sich die Schiffe in SW Armada wie echte Großkampfschiffe anfühlen und es nicht wie einfach nur eine Übertragung vom Jäger- zum Großkampfschiffmaßstab wirkt – so wie man es mit Star Trek Attack Wing gemacht hat.
Ich bin auch gespannt und der Kauf von Armada ist fest fürs nächste Jahr eingeplant.
Wow, das klingt mal echt interessant. Das wird wohl genauso einschlagen wie X-Wing. Ich stelle mir aber den Gebrauch der Manöverschablone umständlich vor. Ob man da nicht Gefahr läuft die Schablone vor lauter Modellen überhaupt nicht anlegen zu können?
Hmhmhhmmmmm…. Ich mag Star wars eigentlich nicht, aber ein modernes Bewegungssystem für Raumschlachten das dazu noch echt verdammt gut aussieht. Vielleicht muss ich mir das der Regeln wegen doch mal holen.